


Before you begin, please note the fact that this tutorial requires you to have two things: basic knowledge of Photoshop (layers, tools, etc.) and your lineart on a separate layer from your background. If you don't know how to do this, please click here for our Photoshop lineart tutorial. However, if you are using my sample document, you'll already have your lineart on another layer...easy, ne?

Well, you've seen all those images on the internet that look like they're straight from an anime show, and now you want to know how to do it. In this tutorial, I'll explain to you my soft method of shading. You'll see that I use
the brush tool quite a bit, so this may take some practice if you've got a mouse. If you can, I recommend an optical
mouse- they're about $22 and you never have to worry about cleaning them and the bright red light is great for blinding
annoying siblings. If you've a bit well off and are serious about art, you could purchase a tablet for about $90 from
Amazon.com. A Wacom Graphire or Graphire 2 is the best brand, and a 4x5 is all you need. If you don't have either, just keep your mouse clean and don't give up!
The zoom tool will be your best friend... With that, I wish you luck. Also, I'd like you to remember that there is no right way to do this.
You'll find that my technique is probably a mixture of three or four other tutorials on the internet, so feel free to improvise as we go. You won't be really good right away--practice makes perfect! Good luck!
If you've got any questions, please feel free to E-mail me.
L-chan
 Step 1
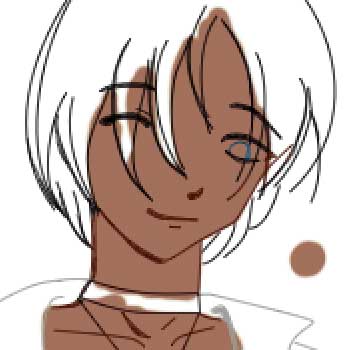
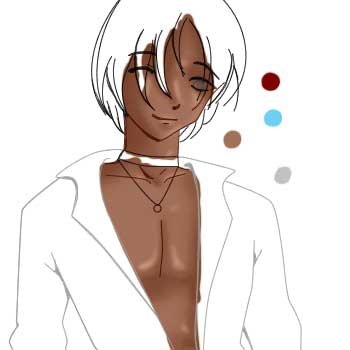
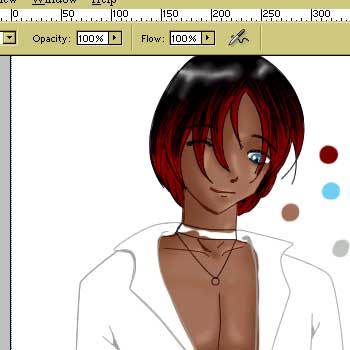
Create a new layer between the lineart layer and the background layer. I usually make a pallet first, so pick some colors you want to use and stick them on this layer. For skin, I chose R166 G115 B88, for his eyes I chose R109 G207 B246, and for the red parts, I chose R121 G0 B0. You don't have to use these colors if you don't want...I'll just be referring to them for the tutorial's sake.
 Step 2
Create another layer in between the lineart layer and background layer. It can be above or below the pallet; it doesn't matter. Name this layer skin. Hit 'B' to select the brush tool and right-click (or use the menu on top) and select a larger size for the brush. I'm going to use 13px. Hold down 'alt' to turn the brush tool into the eyedropper tool temporarily and click over the color for skin on the skin pallet.
 Step 3
Color in the skin (make sure you're on the skin layer). It's all right to go outside the lines...we'll be cleaning that up later.
 Step 4
Go back with the eraser and erase the parts where your coloring sticks outside the lines and outside his body. If the colors overlap with
his hair or jacket, it doesn't matter.
 Step 5
Now, it's time for shading ^^ There are three ways that I shade... I either use masks and create my own color by subtracting from the original RGB values or I use the dodge/burn tools to pick a color. If I don't use masks, I use the dodge/burn tool...but it takes a long time if you're a mouse user because of the pressure-sensitive things and such. We're going to use the first method I described, so hold down Ctrl and click on the skin layer in the layer window to select the contents of the layer. Next, click on the 'Create Layer Mask' button or go to file/layer/add layer mask.../reveal selection. A mask works like tape when you're painting and it operates in grayscale colors. If you click on the mask, you can only paint in colors from black to white. If the color is closer to black, it's opaque (can't see through it), but if it's closer to white, you can. Click on the layer again, and test your mask to make sure you got the right area. Scribble color on an area outside his skin and if you can't see it, it worked.
 Step 6
Make sure you have the skin layer selected (not the mask) and hit 'b' for the brush tool. In the preset menu (top left), select Airbrush Soft Round 50% Flow. With the skin color selected, subtract 50 from its RGB color values to end up with R116 G65 B38. Decide which way you want the light to come from and color the major areas. Don't be afraid to go outside of the lines because the mask prevents that...we'll go back and touch up the shading next.
 Step 7
Right-click and change the size of your brush. Go back and make the shading more detailed. Hold down alt and click to change the colors if needed...get the dark shades to look like what you want them to.
 Step 8
Now add 50 to the original skin color values to end up with something like R216 G165 B138 and highlight areas on the skin. While you're doing this, don't be afraid to go back and touch up some of the areas you missed when you shaded.
 Step 9
You might have a few out-of-place tones or rough edges, so use the blur tool to smooth them out. Change the brush size and strength to get varying effects. Get it the way you like it, then it's
time to move on.
 Step 10
Now we'll move on to his eyes. Create a new layer on top of the skin layer and name it "eyes". Put white around the area his left eye takes up, and
then use your pallet color for his eye color. Make sure you set the brush flow back up to 100% and that you select a hard-edged brush! You probably won't need
masks for the eye layer.
 Step 11
Hair is my most favorite part, so hair we'll do next. ^^ Sylvan's hair is usually mostly black, so black it shall be! Hit 'D' for default colors
and make your brush a little larger. Create a new layer on top of the eye layer and skin layer and name it "hair". Oh crap, we seem to have colored our
hair black and the lineart is black, too! No worries, just duplicate the lineart layer and double-click on it to pull up the Layer Style window. Check the
Color Overlay box and leave it at its default settings. Now that you can see where you went out of the lines, go back and erase the areas over the edges. This time, however, get
the areas that overlap the skin, as well. Turn off the red lineart layer when you're done.
 Step 12
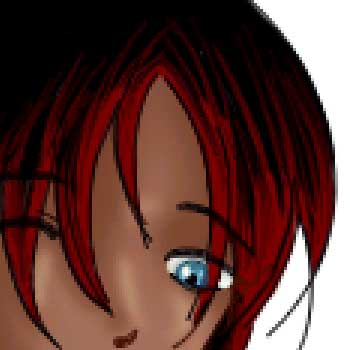
Again, make a mask like we did in step 5. Sylvan's hair is a bit more interesting than most since it's usually dual-colored. Today, we're going to make the ends of
his hair red. If you don't want to do this, skip to Step 14, otherwise keep going. I'm going to make it an interesting shade of red, so use the color R121 B0 G0 and color
the tips of it red. Make sure you're coloring on the layer and not the mask!
 Step 13
To make the hilights look more hair-like, select the smudge tool (under the blur tool) and set it to 1px. Lower the Strength a little and have fun with his hair. If you want, run the
Dodge tool along the edges of his hair for a more interesting look.
 Step 14
Create the color R50 G50 B50 and make an area of highlights on his hair. After you have the first area done, create the color R100 G100 B100 and shrink your bush size a bit, then go over
a smaller section within the first.
 Step 15
Take the blur tool with strength set at 50% and blur the area you just made. After that, take the brush tool set at about 3 px and make a line of white in
the middle of the area, and then go over it with the blur tool again. If you want, you can use the smudge took like we did in Step 13 to highlight the hair after
blurring it a bit.
 Step 16
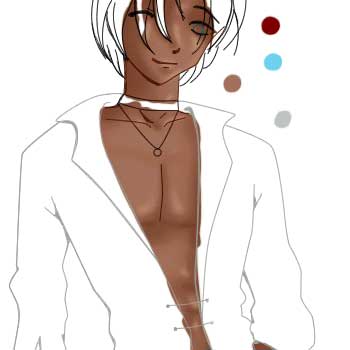
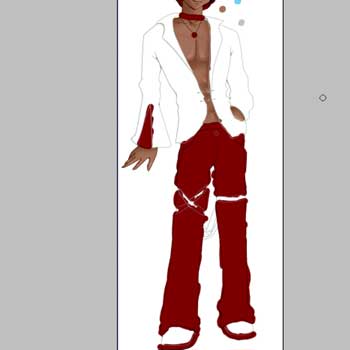
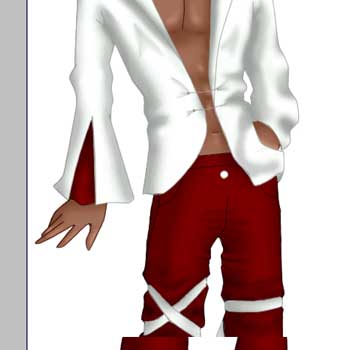
Hmm...let's do the red areas next. Create a layer and name it "red", since lots of him is red. Make sure this layer is above the others (but beneath the lineart, of course), and color his pants, collar, shoe soles, necklace, and that funny
traingular area on his right sleeve red. We're using the R121 G0 B0 color. Since you've probably made a bit of a mess, go back and erase the areas that go
out of the lines and that overlap with the hair and skin layers.
 Step 17
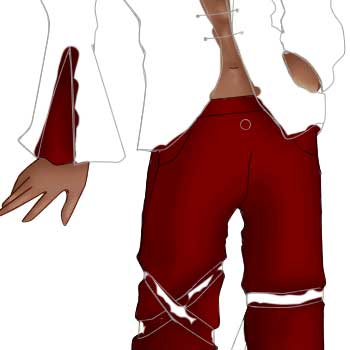
Go ahead and create a mask for the red layer like we did above. Choose the brush preset Airbrush Soft Round 50% Flow like we did before and use the color
R61 G0 B0. Shade in the red areas, making sure you're not coloring on the mask! When I was done with the darkest areas, I changed my color to R81 G0 B0 and went over
the outside of the shading to give it more of a transition between light and dark.
 Step 18
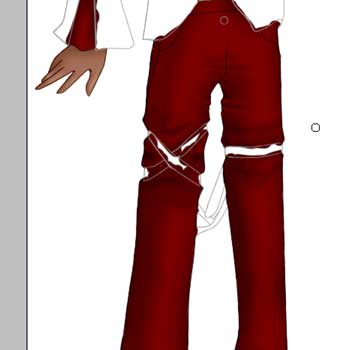
The next step might be a little hard because of my lineart, but go back and fill in wrinkles and things in the clothing. Make sure you are coloring on the
layer itself and not the mask. You can skip this step if you like.
 Step 19
Whew, almost done. Create a new layer and name it "White", and then click on the white background layer and fill it with a darker color, like black. Click back on the
new white layer and set your current color to white. Change your brush settings back to a hard-edged brush with 100% flow and color in the white areas (shoes, jacket, belt-like things). When you're
done with that, create another mask and shade with the color R155 G155 B155.
 Step 20
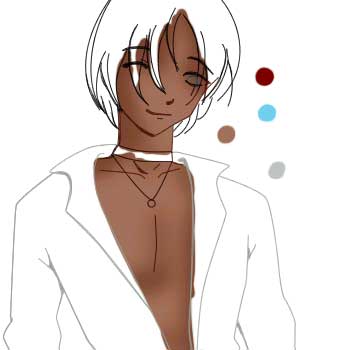
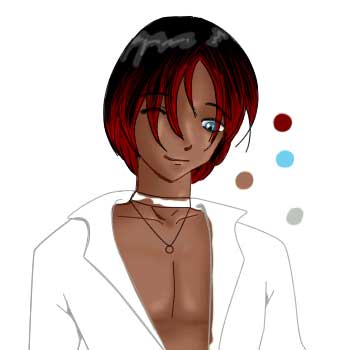
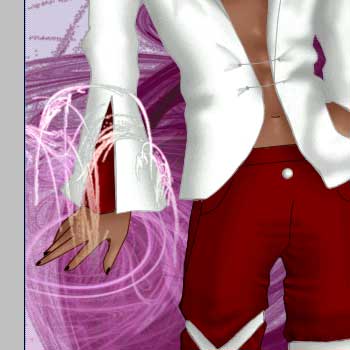
Add some extra things...I made a layer on top of the lineart layer and gave him black fingernails...feel free to finish it off with a background of some sort. I used
KPT filters for this...spiffy swirly thing...